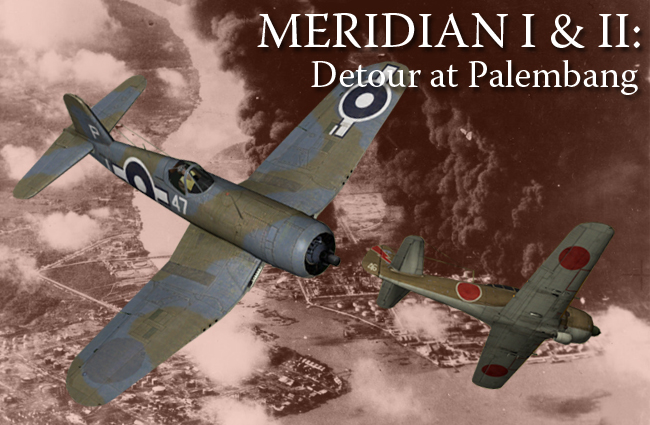
Meridian I and II - Detour at Palembang
In early January 1945, the British Pacific Fleet in Ceylon (Sri Lanka) was moving to Sydney, Australia in an effort to support the United States against the Japanese in the Pacific, but exactly where and how had not been determined.
Admiral Fraser of the British Pacific Fleet flew to Hawaii and met with Admiral Nimitz to plan for different possibilities of how best to use the fleet as quickly as possible. Both Admirals agreed to sail Task Force 63 and its 4 fleet carriers to Sumatra where they would strike the major Japanese refinery at Palembang. Headquarters of the Japanese Occupation forces of Sumatra, Palembang was also a major road, rail, and river transport hub. It was surrounded by thick anti-aircraft defenses and several airfields of the Japanese Army Air Force.
Operation Meridian I began on January 24th, when the Fleet Air Arm attacked the Pladjoe Refinery. It was reported that 30% of the refinery was destroyed for the loss of 6 Corsairs, 2 Avengers, and 1 Hellcat. 5 days later on January 29th, they attacked again, this time across the river at the Songei Gerong refinery. Estimates of the bomb damage weren't immediately clear but fire and smoke poured from the target and a large Tanker was sunk. 6 Avengers, 1 Firefly, and 2 Corsairs were lost in return.
The Fleet Air Arm claimed 30 enemy aircraft destroyed in the air and another 38 on the ground in both missions, as well as a Japanse counter-attack on Task Force 63. The overall success of the Meridian attacks weren’t the knockout blow the Allies had wished for and only really moved major production efforts elsewhere, but it proved the Fleet Air Arm was more than capable of attacking strategic targets with its carrier force.
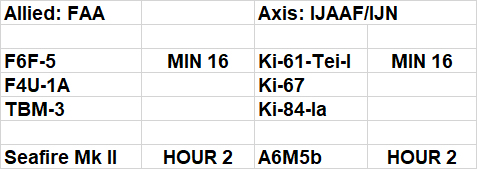
PLANE SET:
SPECIAL RULES:
2ND HOUR AIRCRAFT - A6M5B, KI-67, SEAFIRE MK II, TBM-3
24K ALT CAP FIGHTERS - ALL FIGHTERS
15K ALT CAP - Ki-67, TBM-3
F4U-1A - 1,000lb Bomb Disabled
F6F-5 - 1,000lb Bombs Disabled, Rockets Disabled
TBM-3 - 2,000lb Bomb Disabled
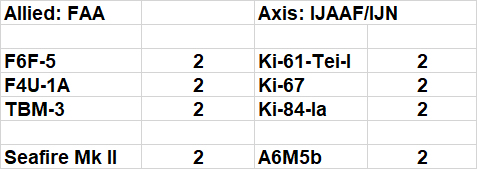
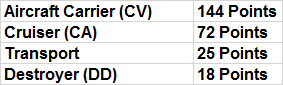
AIRCRAFT SCORING:
OBJECT SCORING:
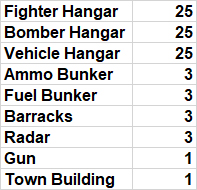
FUEL REFINERY OBJECT - 1.84 points per object.
AMMO FACTORY OBJECT - 2.82 points per object.
ACE MISSIONS
Each side will have one mandatory Ace mission per frame. These frames will represent notable pilots of the time and theater. One pilot from each side will be designated an "Ace" Pilot. They must fly the Aces listed aircraft.
They will be scored as follows.
Ace Pilot = 20 Points
Ace Pilot Kills = 20 Points
So for example if an Ace Pilot is shot down they are worth 20 points to the other side. Likewise, every victory an Ace Pilot lands they will be rewarded 20 points.
ALLIED:
Frame 1 – (FAA) - (F4U-1A) Lt Don Sheppard - Lt Don Sheppard was the only Fleet Air Arm Corsair Ace and one of only two Canadian Aces of the Royal Navy. From Toronto, Sheppard joined the FAA in 1942 and learned to fly lend-lease Navy aircraft in the US. Sheppard took part in Operation Tungsten, the attack on the KMS Tirpitz, in April of 1944 and scored his first victories on the other side of the world in January of 1945. Sheppard scored one kill in Meridian I and shared two others in Meridian II and would bring his total to 5 before war’s end. Sheppard passed away in 2018.
Frame 2 – (FAA) - (F6F-5) Sub Lt Bill Foster - Foster began his scoring during the Meridian Strikes by sharing an Oscar over the Sumatra refineries. He continued his scoring during the attacks on Formosa and later and the strikes on Okinawa in April of 1945 where he would claim another 4 enemy destroyed. 1844 Squadron would be the highest scoring British Pacific Fleet Squadron with 32.5 victories. Foster would be awarded the DFC in September of 1945.
Frame 3 – (FAA) - (F4U-1A) Lt Col Ronald Hay - Ronnie Hay was the only Royal Marine Ace of the Fleet Air Arm. Hays first victory was over Norway in 1940 while flying a Blackburn Skua. Hays would serve at the evacuation of Dunkirk and in the Mediterranean where he would score another victory while flying a Fairey Fulmar. In 1944 Hays was given command of the 47th Naval Fighter Wing which flew two squadrons of Corsairs. During the raid on Palembang Hays claimed two enemy fighters destroyed in the action. Hays passed away in 2001.
AXIS:
Frame 1 – (IJAAF) - (KI-84-IA) Master Seargeant Satoshi Anabuki – Anabuki fought in the 1941 invasion of the Philippines and then in Burma. In October 1943 he shot down three B-24s and 2 P-38 escorts. He downed one of the B-24s by ramming it, wounding himself. He would later ferry Ki-84 fighters from Formosa to the Philippines where he would shoot down 6 F6F Hellcats. He would survive the war claiming 59 victories but was officially credited with 39.
Frame 2 – (IJAAF) - (Ki-61) Lt Hideaki Inayama - Inayama was at Palembang flying Ki-44s when the Royal Navy launched their strikes on the refineries. Inayama destroyed one Avenger bomber during the attack and damaged another. Inayama went on to fly the Ki-100 in the defense of mainland Japan and survived the war to become a Major in the Japanese Air Self-Defense Force.
Frame 3 – (IJAAF) (KI-84-IA) – Katsuaki Kira – Kira flew in nearly every JAAF campaign, Manchuria, Dutch East Indies, New Guinea and the Philippines. Kira would encounter the famed US P-38 Ace Dick Bong and do battle with the elite 49 FG. His unit was destroyed in the Philippines and he would withdraw to Formosa. Kira would last see combat in the skies over Okinawa. He survived the war with 21 kills.
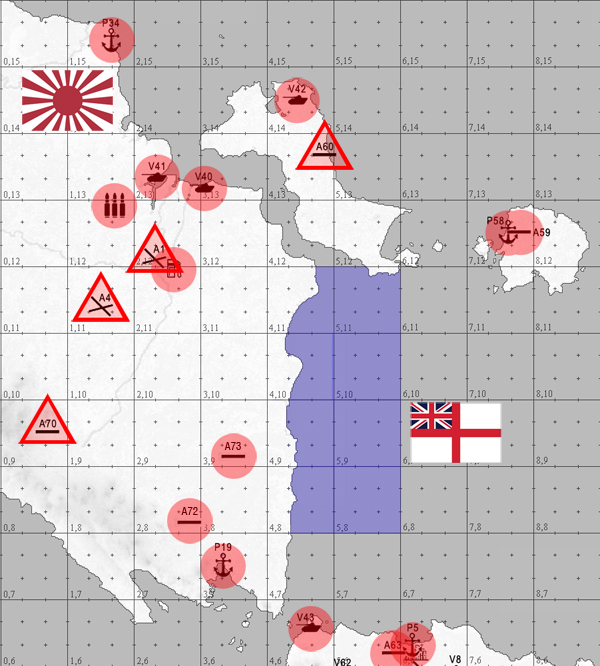
SETTINGS
- Java42 terrain
- Icon Range – Friendly 3k, Enemy 3k.
- No Radar
- Fighter and Bomber Warning Range - 79200 (15 miles)
- Tower Range – 79,200 (for display to match the above Fighter and Bomber Warning)
- External view for bombers (F3) - On
- Friendly Collisions - Off
- Enemy Collisions - On
- Kill Shooter - Off
- Fuel - 1.0
- Ack - 0.3
- Formations - DISABLED
- Bombsite calibration - Main Arena Standard
- Time:
FRAME 1 - 0800
FRAME 2 - 1200
FRAME 3 - 1600
- Object Downtime – full (200)
- Winds - MAX Downdraft 24K
Designed by Nefarious